Set Up Accounts Payable Preferences
Here's how to set up (or change) the preferences and defaults related to the various Accounts Payable functions in the system.
From the Lynx Main Menu . . .
1. Left-click on Bookkeeping
2. A drop down menu will appear.
3. Left-click on Accounts Payable
4. Left-click on Accounts Payable Preferences

Left-click one of the radio buttons to choose which option is automatically displayed when you're trying to Find a Vendor. In this example, "Vendor ID" has been chosen as the default.

Left-click the down arrow  and a drop-down list
of available accounts will be displayed. Left-click the one you want to use.

Left-click the down arrow  and a drop-down list
of available accounts will be displayed. Left-click the one you want to use.

Left-click the down arrow  and a drop-down list
of available check styles will be displayed. Left-click the one you want to use.

Left-click the down arrow  and a drop-down list
of your General Ledger accounts will be displayed. Left-click the one you want to use for purchase
discounts.

Left-click the down arrow  and a drop-down list
of available bank accounts will be displayed. Left-click the one you want to use.

If you select "Yes", the check number will print on your vendor checks. If you select "No", it will not.

Selecting "Yes" for this preference makes it so when adding multiple checks, every new check starts 1 check number higher than the last. For example if you just finished adding check number "120959", when you go to add another check "120960" will be in that check's check number field.

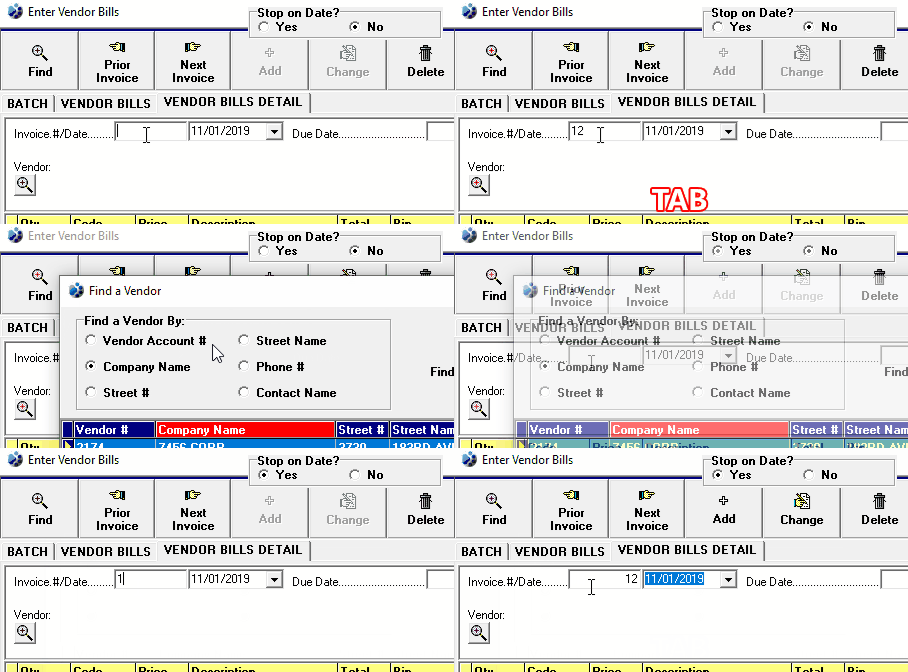
Selecting "Yes" to this preference allows you to use the tab key to go to the "Date" field when entering invoices. Normally (this preference set to "no") if you were to enter an invoice and press the tab key you would move to the "Bill To: Customer/Vendor" field. Example:
