How to Handle Customer Refunds
Here's how to print a refund check for a customer. Typically, refunds result from situations such as overpayments that need to be reimbursed or tanks that are picked up and have fuel in them that needs to be paid for. Whatever the reason, it is handled pretty much the same way. The exception is where there is an inventory item involved.
From the Lynx Main Menu . . .
1. Left-click on Bookkeeping and a drop down menu will appear.
2. Left-click on Accounts Receivable and then left-click on Invoicing.
3. Left-click on Add an Invoice
Batch and then left-click on the  tab.
tab.
4. Press the  key
and then press the
 .gif) key.
key.
5. This will display the Find a Customer window. Select the account getting the refund.

If the refund involves an inventory product, key in the quantity as a MINUS number (like -12, for instance), the ID of the product involved, and the price you want to use. This will allow the system to add this quantity back into the inventory for this product. If the refund does NOT involve an inventory item and is simply a cash refund for the account balance, skip this step.

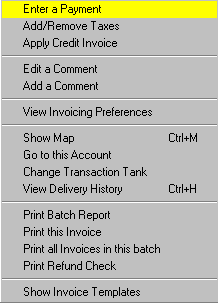
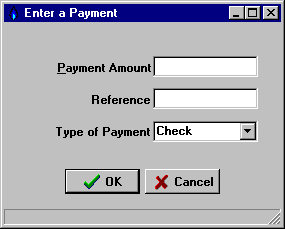
6. Left-click the  button and then left-click on Enter a Payment.
 and this window will appear
  .
.
7. Enter the payment amount (as a MINUS amount) and left-click the  button. This amount is typically (but not always) the
Account Balance shown at the bottom center of the window, such as
  . In other words, you are issuing a refund check to zero out
the account.
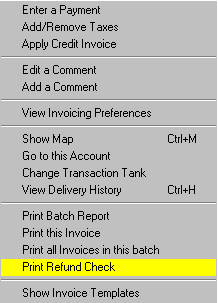
8. Left-click the  button and then left-click on Print Refund Check:

9. After your check has appeared on the Print Preview window, you can
left-click the print button  to print the
report or left-click the
  button to exit.
10. When you're all done, left-click the close button  to return to the Lynx Main
Menu.